As the festive season approaches, there's an undeniable magic in the air, and what better way to usher in the holiday cheer than with a delightful do-it-yourself project? Imagine a whimsical Christmas countdown that not only adds a touch of charm to your home but also brings the spirit of the season alive. In this step-by-step guide, we'll show you how to create your very own DIY Christmas countdown chimney with Santa – a heartwarming addition to your holiday decor that will have everyone counting down the days with eager anticipation.
TOOLS USED
18V ONE+™ Cordless 190mm Compound Sliding Mitre Saw
18V ONE+™ HP Cordless Brushless 210mm Table Saw
18V ONE+™ Cordless Glue Gun
18V ONE+™ Cordless Compact Drill Driver
18V ONE+™ Cordless Palm Sander
MATERIALS USED
2.5cm x 5cm x 10cm piece of wood
6.3mm Plywood
Acrylic Paint
Christmas Decor
Foam Paint Brush
Wooden Rectangular Art Plaque
STEP 1
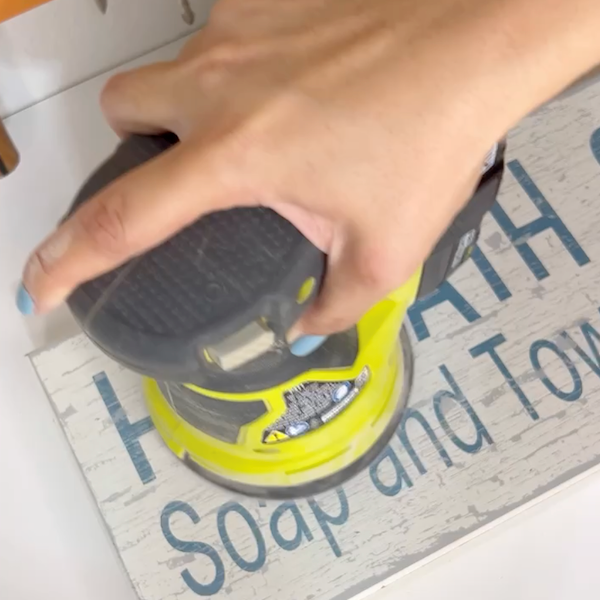
Sand down a wooden frame to remove the paint from the wood using the 18V ONE+™ Cordless Palm Sander to get a great base for the chimney.
STEP 2
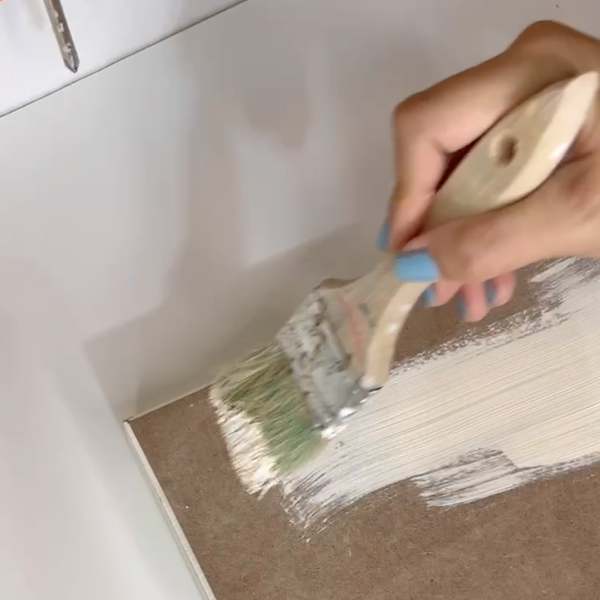
Apply paint to the wood. White is recomended however feel free to try other colours.
STEP 3
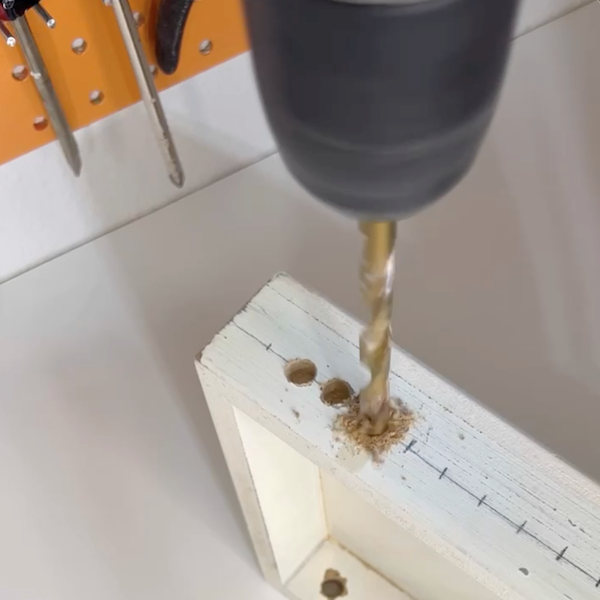
Using the 18V ONE+™ Cordless Compact Drill Driver, drill 12 evenly spaced holes on noth sides of the wooden frame with a 1.3cm bit.
STEP 4
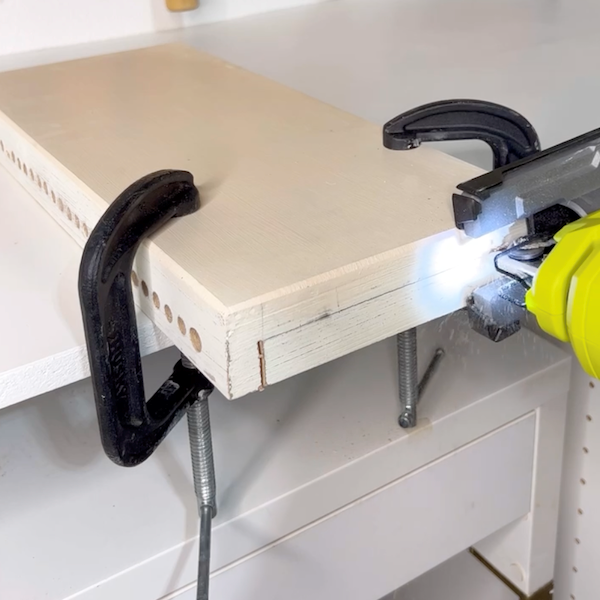
Cut out the bottom and top pieces of the frame on the short ends using the 18V ONE+™ HP Cordless Brushless 210mm Table Saw.
STEP 5
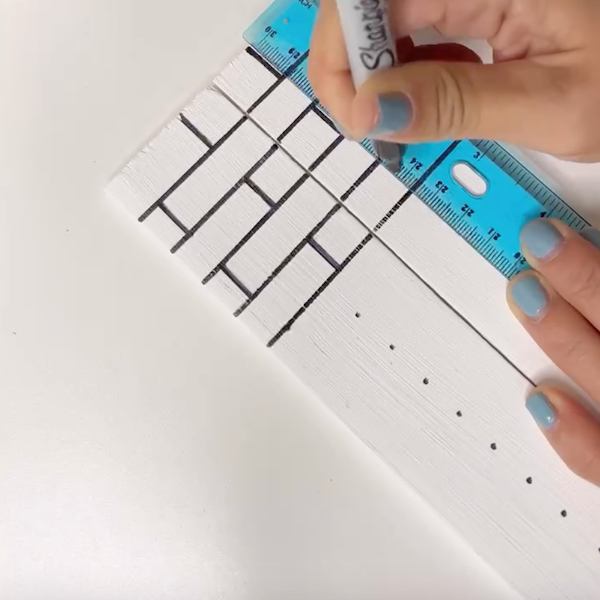
Use a permanent marker or paint to create a brick-like pattern on the white painted wood.
STEP 6
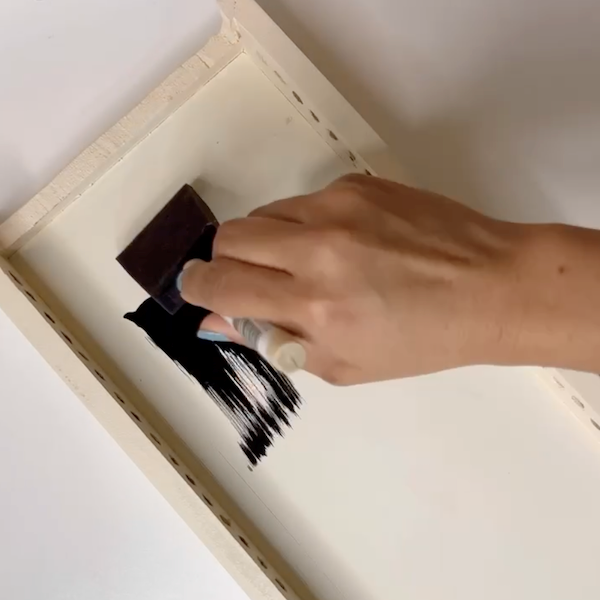
Paint the inner side of the frame. Black is recomended but again you can be creative with the colours.
STEP 7
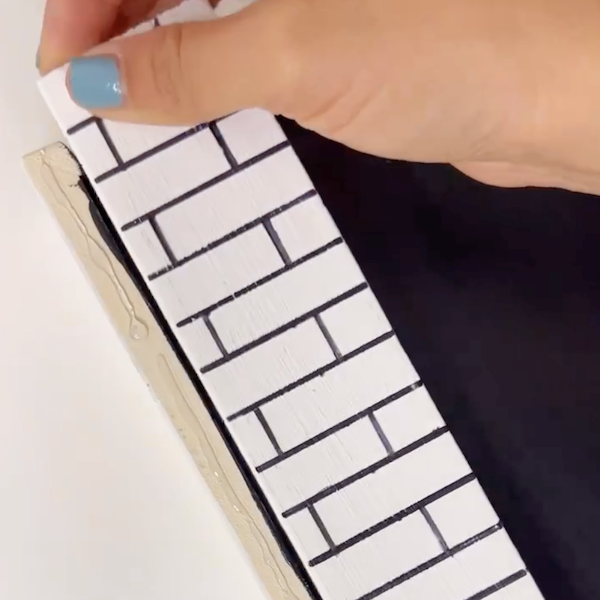
Using the 18V ONE+™ Cordless Glue Gun, attach strips of white patterned brick on the inner sides of the frame, to create part of the fireplace.
STEP 8
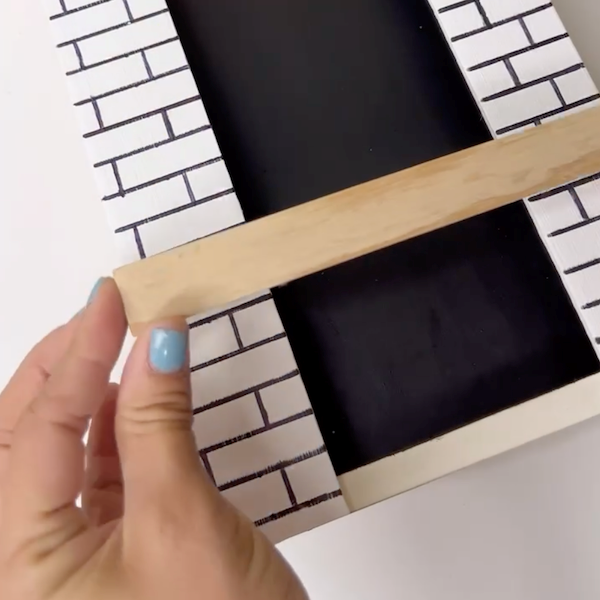
Attach a piece of wood the width of the fireplace that will serve as the mantle.
STEP 9
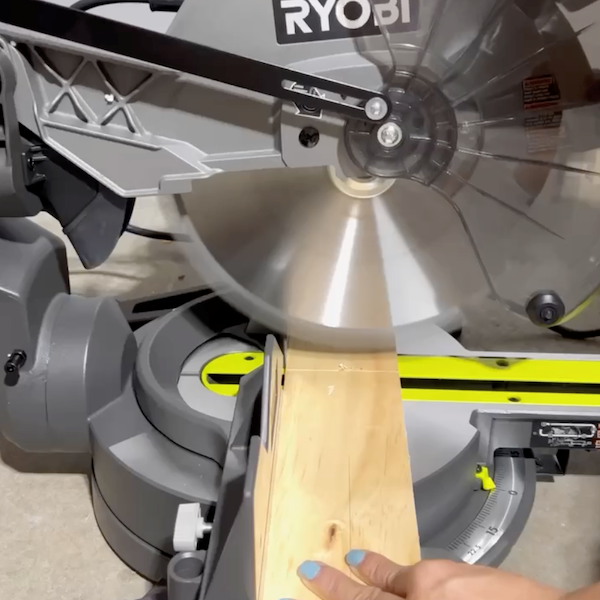
Cut two pieces of wood to size to fit the width of the inside of the fireplace using the 18V ONE+™ Cordless 190mm Compound Sliding Mitre Saw.
STEP 10
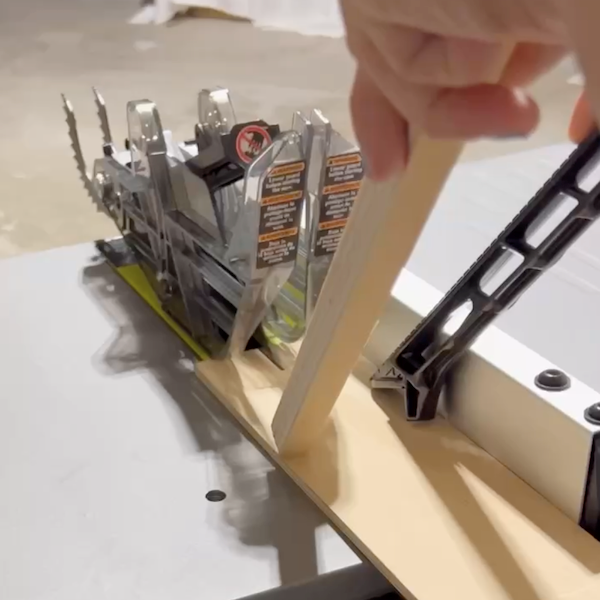
The next cutting task is cutting strips of wood which will create a block. The 18V ONE+™ HP Cordless Brushless 210mm Table Saw is reocmended for this for accuracy.
STEP 11
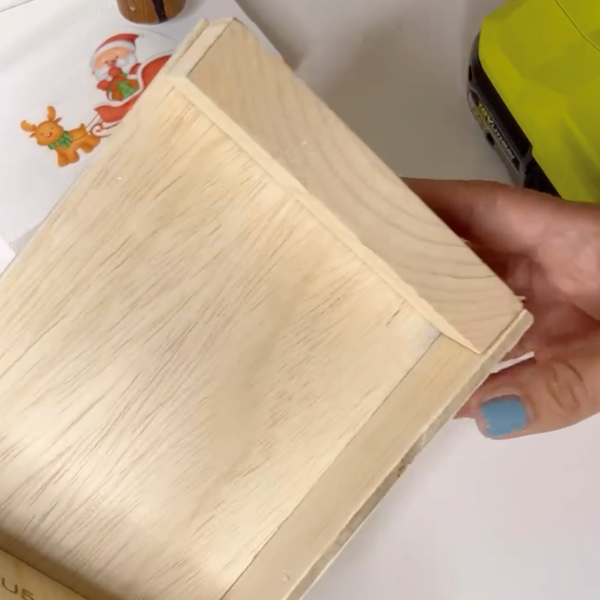
Using the 18V ONE+™ Cordless Glue Gun attach the pieces together to create a block piece.
STEP 12
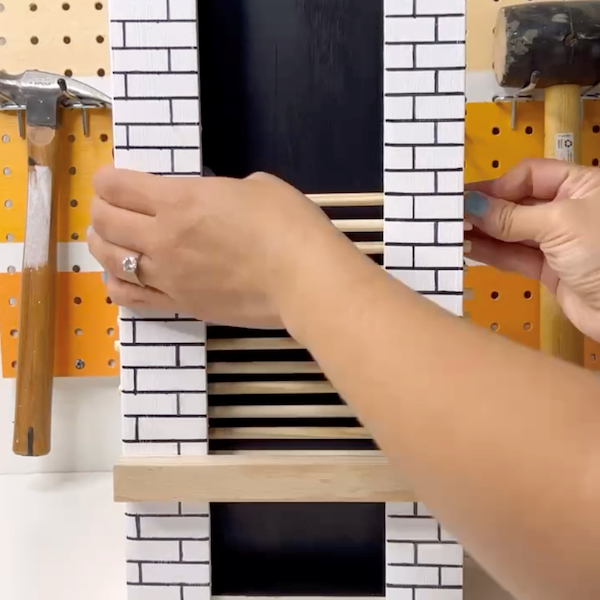
Insert round dowels into each of the holes on the sides of the fireplace.
STEP 13
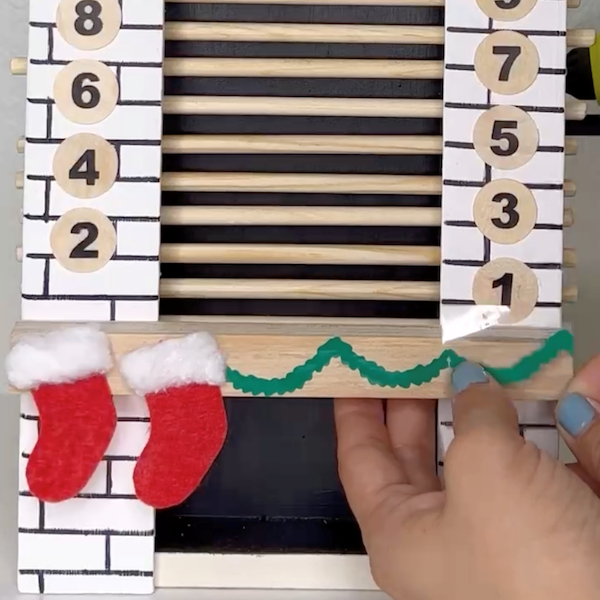
Attach decorations onto the mantel piece as desired to embrace the festive spirit.
STEP 14
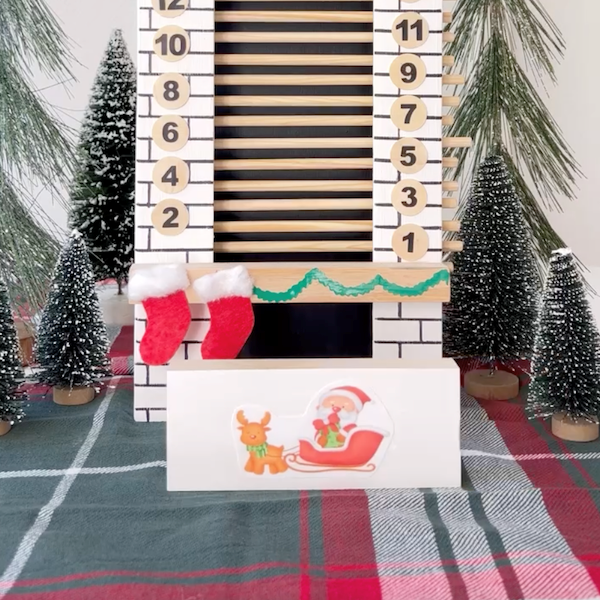
Attach numbers up to 24 on each side of the dowels. Decorate the block that will go down the chimney as desired. Remove the dowels every two days to make the block travel down the chimney.
Whether you're a seasoned crafter or a DIY novice, remember that it's the personal touches that make this project truly special. From the choice of wood to the placement of each festive detail, let your imagination run wild, and make it uniquely yours. Once you are done, the count down for christmas begins!
Don't forget to tag us in your DIY projects on @ryobitoolsuk